Cleaning Checklist Before the Holidays Are Here


We ALL know that the season for binge cleaning is officially here ladies and gentlemen! But don't worry, we've got you covered with a few tips and a step by step guide to help you organize your cleaning process before the guests arrive.
Step 1: Start early...like a week in advance if necessary
Pretend that you are your mother-in-law or some officer from the Health Department or better yet, the Cleaning Police, and you're walking through your house. Take notes of the mess (as in - placing sticky notes on your fridge so that you remember next time) and warn yourself with those notes and a deadline.
Step 2: Declutter
Yes, that's right. Remember those empty boxes you collected years ago and did nothing with? Or the clothes you were wearing in the '90s and have been stuck in your closet since then, or the "important" mail you've been piling up for weeks/months? Does that sound familiar? Yeah, okay...I'm sorry to break it to you, but they need to go...and fast! When you pick up an item, and you're not sure if it should be donated or has to be thrown in the trash or recycle bin, ask yourself 3 Honest questions:
1. Have I worn/used this item in the past 3 years?
If the answer is "NO" (especially if it's in all CAPS) then it needs to go because you most probably will never use or wear it again.
2. Is this item working or is it damaged, broken, chipped, irreparable (or repairable but too expensive to do it and/or you'll most likely never repair it)?
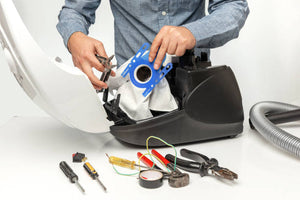
If the answer is "Yes", then it needs to go. A good example is a cheap vacuum that you own and that needs repair, but it will cost more than what you've paid for the vacuum itself. But hold on...don't throw it out just yet, because you can always trade it in at your local vacuum store and save some money when you buy a new vacuum. My advice is, please invest in a better quality vacuum that will last you longer and give you better cleaning performance. We all love those clean lines after vacuuming the carpet, don't we?
3. Do I need this item or is it just collecting dust and taking up space in this house?
Do yourself a favor and get rid of the stuff you know you've never used and has just sat there in your closet or storage area for Years! You're welcome.
Step 3: Take a close look at your Walls
Did you know - walls get dirty and dusty, too? Take a look at the corner, crown moulding, light fixtures, baseboards, and (if you have kids and/or pets) check any wall area that is three feet off the ground. Hold on, you're saying you don't see anything? Do the finger test before I say "I told you so": you take one finger, you swipe it over the corners and baseboards and voila! Can you see how much dust and cobwebs you've collected so far and no one gave you points for that? Just kidding, but anyway 'tis the time to put to good use those vacuum attachments and accessories.
Step 4: Use the Right Cleaning Products
Like most American households, you probably have a bunch of cleaners for all kind of purposes but they're either expired or don't work that well. I personally always use a few cleaners that I'm crazy in love with, and you will be, too! For spots and stains I normally use my Oreck No Return Spot Remover for Pet Odor & Pet Stain Remover It works wonders if you have a ton of stains and spots caused by kids, pets and clumsy adults. It can lift off even permanent marker stains from the carpet. (No need to scold your child for the messy school project he did a year ago). For stubborn pet hair and even human hair, I use the Gonzo Pet Hair Lifter Sponge. It's a life saver and super easy to use! I always use it dry and just swipe any surface with it to remove the pet hair. I use it over and over again and the sponge lasts a long time. For polishing the furniture and almost everything else in the house (mirrors, tile walls, stainless steel, glass, wood, granite, leather) I use the Original Bee's Wax All Purpose BeesWax Polish Aerosol Spray OMG, where do I begin? Let me give you an example: my stainless steel appliances were a mess when after renovating my kitchen, with fingerprints ALL over. I thought they would never come off. Well, let me tell ya', not only did they come off, but my stainless steel appliances stayed fingerprint-less for a good 3 months.
For my hardwood floors, I always use Bona products. Their mops are lightweight and great on hardwood. I always use two separate Bona removable pads when cleaning hardwood and tiles because I'm using Bona tile solution for that purpose and I believe that mixing the pads with different cleaning solutions on them will mess up the results.
Step 5: Deep Clean
Don’t forget to vacuum and sweep under your couches, behind the fridge and all those other places you usually forget/avoid. You don’t want to be embarrassed by pet hair under your dinner table or your kids' Lego pieces that were "forgotten" (almost intentionally) on your fluffy shag rug (Ouch!). Don't forget/avoid to give your carpet and area rugs a good spot cleaning and shampooing with a reliable carpet extractor machine (at least once a year) to remove stubborn stains from footprints, spills, and pets.
Step 6: Window Cleaning Time!
I hate to confess but I'm also a window cleaning freak and I hope you are, too. Who doesn't like to see those beautiful trees outside through the window (without squinting) and let the sunshine warm your house during the cold weather? I just can't stand dirty and grimy windows, so after scrubbing and cleaning them, I always polish my windows with Bee's Wax Spray and a dry cloth. It doesn't leave residue and it actually protects the glass from mineral deposits for a good while. The only thing I'm concerned is birds getting knocked off. I'm assuming they can't realize there's a squeaky clean window between them and the space they're trying to fly into.
Step 7: Dust, dust, dust
Need I say more? You don't want your grandma sneezing every 5 minutes while you're trying to enjoy your green bean casserole, do you?
Step 8: Clean up the Fridge
Today is the day to get down to the minimum cooking essentials. Throw away the expired stuff and make room for this year’s leftovers.
Step 9: Arrange the beds and fluff all the pillows
Remember those nosy relatives who want to see your new house not because it's new but because they want to visually "inspect" how clean it is and decide if it's worth giving a "dirty" look or not? Make sure that your house "exceeds" their expectations, if you know what I mean. Arrange and organize your beds and fluff all the pillows to give them a fresh look. Don't forget about that mattress tool and put it to good use before you give your beds a "high-end hotel" look. I highly suggest putting some holiday music on and create a warm and relaxed atmosphere when your guests arrive. You don't want awkward silent moments or hear your dog release toxic gasses. Have some odor eliminators handy for that matter.
Step 10: Shine up the Mirrors and the Shower Doors
Give them a good cleaning first, then dry them, and lastly, finish polishing them with the above mentioned spray I use - called Bee's Wax Aerosol Spray and a dry cloth. Some of those pesky relatives may not realize there is a mirror at the end of the hallway and may walk right through it. High-five!
- Red Vacuums


Comments 0