How To Repair Your Vacuum Cleaner – Secrets Revealed


They say “Machines do not live as long as humans”, so there is no point getting attached. However, if it’s your lovely, “always there in the time of need” vacuum cleaner, you will tend to get attached no matter what. So what would you do if one day, all of a sudden, it stopped working? If the answer is, “Sorry, I have no idea” then, Don’t you worry, we have a helpful guide right here for you.

Step 1 – “The Anatomy”
Before you put the gloves on for surgery, you need to understand the complete anatomy of your vacuum cleaner, so study your vacuum cleaner inside and out before any grave danger befalls upon it. By this, I mean going back to basics, which I know would seem ridiculously obvious in the beginning, but it will make so much sense in the long run.
Step 2 – Prevention Is Better Than Cure
You understand your vacuum cleaner inside and out now. So what’s next? The next step is “Regular Maintenance” in order to avoid major repairs in the first place. If you own a vacuum cleaner that uses vacuum bags, replace the bags when they're about 3/4 full. Make sure the cord does not have any cuts and the prongs are not loose. Some vacuum cleaners are battery operated, and need to be charged occasionally. Make sure that you do not overcharge the batteries or overuse them when they are low in power. Clean the filters if you have the rinsable type and replace them with new ones at an appropriate interval of time, about once a year, or 6 months if you use your vacuum often. If you've cleaned everything and there's still no pickup, check the hose for a clog. Remove the hose from the vacuum and drop a coin down one end. If it doesn't come out the other end, you know you have a clog. If your hose has electrical connections running through it to a powered floor brush, do NOT use the following steps to remove the clog, take it to a professional (there is too large of a chance of damaging the internal wiring, costing you even more money by then needing to replace the hose). Remove the clog by pushing a broomstick or a metal wire through the hose. This should remove any blockage. You can prolong the life of your vacuum and keep the air moving through the machine so it picks up better when you follow the above maintenance and preventative tips.

Step 3 – Study The Symptoms And Detect The Problem
Okay! Let me explain it this way. When you go to a Doctor, what does he do first? He lets you talk about your problem and study's your symptoms to come to a conclusion. This is exactly what you need to do. Make a list of all the things not looking normal in your vacuum cleaner before coming to any diagnosis and then detect the problem. Trust me, it will save you a lot of time and effort.
Step 4 – Operation Time
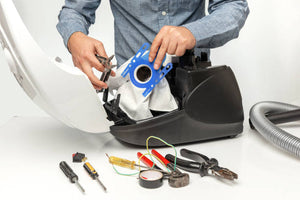
Now that the problem has been detected, what is left for you to do, is operate on it. This could be tricky. If you're pretty handy, simple repairs should be easy for you to handle, but when it comes to complicated problems for which you need sophisticated tools and expertise, you need to go to a real vacuum doctor that is the vacuum repair service provider.
Step 5 – Doctor “Fix It”
Last but most important is, whether you have a complicated carpet pro vacuum repair or anything else, a vacuum repair technician will be able to diagnose your unit and be able to tell you what's wrong with it. If it's not worth repairing you'll be guided to a vacuum that is suitable for your specific cleaning needs as a replacement.

- Tags: Air Purifiers Best air purifier best vacuum Bissell Vacuum Cord Repair Vacuum Repair Mclean Vacuum Cord Repair Bissell Vacuums Carpet Pro Vacuum Repair central vacuum Central Vacuum Dealer Central Vacuum Installation Central Vacuum Repair Central Vacuum Service DIY vacuum repair Dyson Dyson Cordless Vacuum dyson dealer Dyson Dealer Fairfax Dyson vacuum dyson vacuums filters IQAir Local miele dealer local vacuum store Miele Miele Appliance Miele canister vacuum Miele Dealer miele dealer fairfax Miele Vacuum Riccar riccar dealer Riccar Vacuum Riccar Vacuum Bags Riccar vacuum cleaner Riccar vacuum repair Sebo Vacuum Cleaner Sebo vacuum dealer Sebo vacuum repair simplicity simplicity vacuum bags simplicity vacuum dealer VA Vacuum Bags vacuum cleaner repair Vacuum Parts Vacuum Repair Vacuum Repair Services Vacuum Repair Virginia vacuum repairs vacuum service vacuum store vacuum store ashburn vacuum store fairfax vacuum store falls church vacuum store mclean vacuum store oakton vacuum store sterling vacuum store tyson's corner Vacuum Store Vienna
- Red Vacuums


Comments 0